this tutorial, I thought to myself - may
any similarity to other tutorials is purely coincidental and is not intended
My Tuts neither own Ausgegebn will
My Tuts neither own Ausgegebn will
still new chair on other pages.
may also not be translated without my permission or
be used for Workschops / schools and craft groups.
may also not be translated without my permission or
be used for Workschops / schools and craft groups.
© by Supersuzi

written using GIMP 2.6 on 12/28/2010
first
create a new blank canvas
I take desktop size, you can also take A4,
since you can then print it
give this same level for the first time an alpha channel
second
you create the following guides:
* 50% - ie. Centered horizontally and vertically and
* * 100 px by all moraines
50px away again from all the guides
 |
| so it looks to me from |
 |
| |
at the bottom you can see where you just with your guide you,
you of course, the values can all have -> Image -> Guides -> ; new line type
same time you save it as *. xcf from
third
now select the Rectangle Selection tool
have clicked make sure that you "to the current selection Add
have noticed the aspect ratio to 4:3
to create 2 selections such as the Screen
start at the "crossroads" of the guide at
and pull in opposite direction,
to your selection to the next guide comes
This is from the right side to right,
and from bottom left to top right,
also from bottom right to top left ...

This looks at an A4 sheet of different
A4 is 4:3 - that the choices accurately reflect the guides
I craft hence the difference in 16:10
4th
now the ellipses selection tool
and "Add to current selection" is click
also the aspect ratio of 4:3
and raise the other two areas, an oval selection

5th
now press the "delete" button and you have holes in your sheet ...
and how clean you have to cut - Class ... ;)
sixth
now go to
-> enlarge -> Selection -> By 10 - 15 px
-> Options -> edge -> 1 - 2px
-> Edit -> Fill with FG Color
(which was supposed to be black too - if not change that)
7th
-> Options -> select anything
8th
-> Filter -> Artistic -> screen -> depth but only 2 9 px
-> Image -> Guides -> Remove all guides
10th
new guides up all pages 20 & 70 & 90px away

11th
a new level
12 Creating .
now pick up the rectangle selection tool
the aspect ratio of
and take a selection from the innermost guides
13th
switch -> Invert and
-> Selection in the new layer fill with yellow

14th
now comes the second Choose a line from the inside,
again
invert the selection again
with blue
15th
the same stuff with the outermost part of this guide
then fill with red

16th
the guides you can now remove it for now and
the guides you can now remove it for now and
cache
17th
take the magic wand and click in the yellow edge
18th
- copy> - -> Edit> Paste as new image
because now goes further:
19th
-> Image -> Canvas Size ...

20th
-> Layer -> Layer to Image Size
21st
-> Filter -> Alpha to Logo -> Chrome
ask because at 5
22nd
the top level in the Manager, right-click and combine
down
23rd
this level "Drop Shadow"
the Manager, right-click and choose Alpha to be
-> Edit -> Cut
24th Change
in the other window, where the mat is already and
-> Edit -> Paste
now it is a floating selection,
we do have these in a new level,
we need the Create New Layer just click to the Layers dialog
now it is the same center of the image
-> Selection -> select anything
25th
now you can cache it for now and the empty image
close
26th
now marked with the magic wand, the red part of the frame
Make sure that the Layers dialog, the level is marked with the 2 colors
27th
repeat steps 18-25 with the same values
as you can in the filter dialogue instantly on top Repeat Chrome "on go
because they are used the same settings
28th
now marked with the magic wand, the blue part of the frame
Make sure that the Layers dialog, the level is marked with the 2 colors
29th
new layer -> Layer - Cut> Selection
Gradient Brushed aluminum "and set on the edge raise

30th
-> Filters -> Blur -> Gaussian Blur with 5px
31.
now push your colored layer at the fill up the Layers dialog
32nd
Alpha to Selection
33rd
with white
34th
-> Filters -> Decor -> Edge Bevel with 20px
the 5 times apply
35th
go to -> Layer -> Transform -> Rotate 180 °
36th
source and the edge bevel here 2 times at 37th
when you now have a floating selection, click the anchor to them to unite with the white frame
then you must re-create the Alpha to Selection
38th
foreground color to black and create a new layer
39th
now take a brush
put the opacity to about 40 -50
Circle Fuzzy (19) and Scale set to 10
and paint a few times over the frame
(the more you go over a body, the darker it)

40th
apply the Gaussian blur to it to
41st
combine this level down
42nd
the mode of the frame layer to "Overlay"

43rd ;
now the background layer invisible
and click the right mouse button in the Layers dialog to
Visible Layers
(trimmed to image)
44th
background layer visible again make and save
If you speicherst it as *. png, you can place your photos behind and finished
If you like it so speicherst as *. xcf, can you customize the color of the frame or the photos and make
We now also
45th
you looking for 4 photos, you want to do in and pull her into the picture
46th
scale it and place them in the right place
(if you Skalli not need it, you have to add the alpha channel - Create a right click in the Layers dialog and alpha channel -
36th
source and the edge bevel here 2 times at 37th
when you now have a floating selection, click the anchor to them to unite with the white frame
then you must re-create the Alpha to Selection
38th
foreground color to black and create a new layer
39th
now take a brush
put the opacity to about 40 -50
Circle Fuzzy (19) and Scale set to 10
and paint a few times over the frame
(the more you go over a body, the darker it)
40th
apply the Gaussian blur to it to
41st
combine this level down
42nd
the mode of the frame layer to "Overlay"
43rd ;
now the background layer invisible
and click the right mouse button in the Layers dialog to
Visible Layers
(trimmed to image)
44th
background layer visible again make and save
If you speicherst it as *. png, you can place your photos behind and finished
If you like it so speicherst as *. xcf, can you customize the color of the frame or the photos and make
We now also
45th
you looking for 4 photos, you want to do in and pull her into the picture
46th
scale it and place them in the right place
(if you Skalli not need it, you have to add the alpha channel - Create a right click in the Layers dialog and alpha channel -
otherwise you can not erase)
47th
Rub away the bodies, if necessary,
the wrong under the "hole" are
48th Give
the background layer
a shadow with 0-0-10-no change in size
49th
now choose your photos with the Color Picker a color
with you color the frame
like this you have to select the photo, which contains the color
and click with the eyedropper to the location
(possibly several times until you see the right foreground)
50th
now click in the Layers dialog to frame
and create create a selection from Alpha channel
51st
new level
fill with your foreground color
52nd
change at this level now, the mode and opacity, Like
you until the color of your frame
I have the mode to "color" is set
doubled the frame again, and at this the mode to Grain merge "

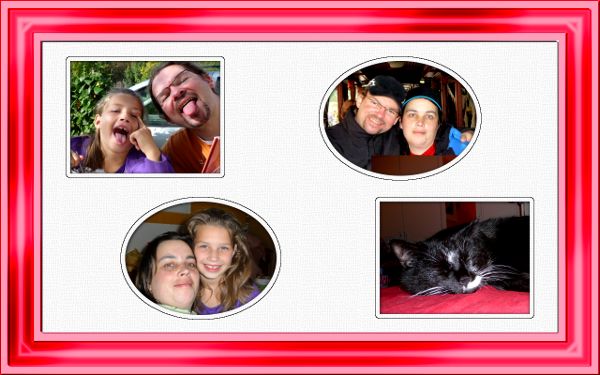
now you're done and you can save it as *. jpg
I hope that was fun ...
47th
Rub away the bodies, if necessary,
the wrong under the "hole" are
48th Give
the background layer
a shadow with 0-0-10-no change in size
49th
now choose your photos with the Color Picker a color
with you color the frame
like this you have to select the photo, which contains the color
and click with the eyedropper to the location
(possibly several times until you see the right foreground)
50th
now click in the Layers dialog to frame
and create create a selection from Alpha channel
51st
new level
fill with your foreground color
52nd
change at this level now, the mode and opacity, Like
you until the color of your frame
I have the mode to "color" is set
doubled the frame again, and at this the mode to Grain merge "
now you're done and you can save it as *. jpg
I hope that was fun ...
0 comments:
Post a Comment