A little paint, animate a little - but a lot of PI
we tinker a Christmas card with PI
This tutorial written by myself -
each may similarity to other tutorials is purely coincidental and is not intended
My Tuts neither own Ausgegebn be
My Tuts neither own Ausgegebn be
be new chair on other pages.
may also not be translated without my permission or
be used for Workschops / schools and craft groups.
may also not be translated without my permission or
be used for Workschops / schools and craft groups.
© by Supersuzi


first Open a new canvas with 600x450px
with a color of your choice
or a background pattern
second Now select your brush in a dark brown
and switch to "Object mode"

third male with a branch

4th Now select the brush with the default "grass"
and paint in various shades of brown and sizes along the road

5th Now save it first as a *. psd or *. ufo 6 onwards
Rename this layer (wood)
ever the road is now ready ...
now goes to the fine work, with the needles
7th male with a shade of green in the object mode
with the normal brush several needles
8th Property mode - object mode again
(so you have a new level)
a different shade of green and still some number of needles
9th Sun paint a few levels
10th move them in the order as you please

11th Save
12th Now double the timber level and move them to the top
13th in this top-level timber:
click the right mouse button in the Layer Manager on it
and select "Properties"
14th then put a slight Vignette
and a transparency

15th if you like it you can save it
16th unite all the branch levels with each
17th Now you can have a ball or a star or whatever
dranhängen
18th Save again ...
19th go to your background layer and choose Selection
all - Selection border with 10 - 20 px
depending on how wide you want to have him
20th Selection object in turn and fill
with a gold or silver texture
21st Web - Button Designer - Any form
to taste
these levels now push to the top in the Layer Manager
22nd Shadow
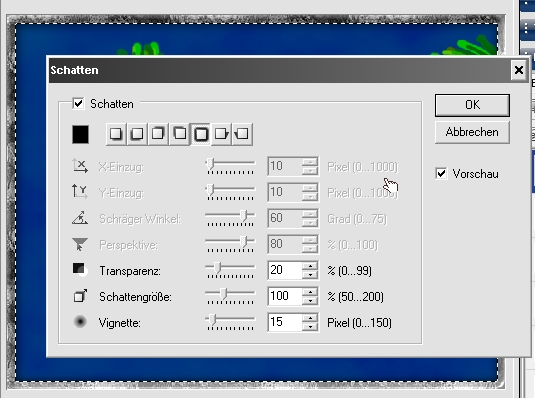
23rd the same shadows and give your branch and your decoration
24th create your text
and fill it with your gold or Silbettextur
25th enter your text and the shadow
26th if you want to print the card, you're finished here
and they can save and print
if you want to animate still just come along:
27th will double the margin
28th binding on one edge, and branch decoration level have adopted an
and go to Web - Image optimizer and save it as png from
29th then the other edge and the text level of binding with the background level, a
30th the HG level is marked - now go into the bag of tricks:

and then save

31st Now open the png from earlier in your Gif-Ani
32nd go to "Edit - Canvas Size
and put them back on 600x450
(if like me should be greater by the shadows)
33rd now go to "Insert Image" on

34th Now, push your frame / branch level to the top
35th save it again as *. gif and you're ready

I hope this tutorial has made you a little fun
and it shows me also your results.
0 comments:
Post a Comment